

- Working Time: 10 - 20 minutes
- Total Time: 10 - 20 minutes
- Skill Level: Beginner
- Estimated Cost: $0 to $15
- Use pliers carefully to unscrew a stubborn faucet aerator.
- Apply heat or penetrating oil to loosen a stuck aerator.
- Clean or replace the aerator to restore water flow.
Faucet aerators are small screens attached to the end of faucets, designed to mix air with water to reduce flow and save water. These screens can get clogged with grit and mineral buildup, particularly in areas with heavy mineral content in the water, leading to low water pressure. Fortunately, cleaning the aerator is a straightforward way to restore proper water flow. Many people might not realize an aerator is attached, leading them to call a plumber when a simple cleaning will do. In some cases, if cleaning doesn't resolve the issue, replacement may be necessary.
What Is an Aerator?
An aerator is a screw-on screen fitting at the end of a faucet spout designed to break up the solid stream and add air. This can reduce water usage by up to 30 percent.1
What You'll Need
Equipment / Tools
- Channel-type pliers
- Rag or masking tape
- Hair dryer (as needed)
- Small stiff brush
Materials
- Penetrating oil (if needed)
- Lime-dissolving solution (if needed)
Instructions
:max_bytes(150000):strip_icc():format(webp)/removing-a-faucet-aerator-2718836-08-5a5f8acc9cc24759b5d1868ea2eadb60.jpg)
The Spruce / Kevin Norris
-
Attempt to Remove by Hand
- Dry the faucet and your hands to grip the aerator firmly. Unscrew the aerator by hand, as most are threaded this way.
The Spruce / Kevin Norris
-
Use Pliers
If hand removal doesn't work, try pliers. A small pair of channel-type pliers works best for this.
- If the aerator is in good condition and you want to reuse it, wrap a rag or masking tape around it to protect the metal surface from scratches from the pliers.
- Grip the aerator between the pliers' jaws, keeping the jaws only on the aerator, not the faucet spout.
- Turn the aerator counter-clockwise (as viewed upward from below the spout) to unscrew it from the faucet.
- If it doesn't budge, move the pliers a quarter-turn around the aerator and unscrew the aerator from the new position. (Moving to different positions can gradually loosen a stubborn aerator.) Take care not to grip the aerator too tightly because the metal is soft and will bend easily, making your job even harder.
Aerators are sometimes thought to be "reverse-threaded," but it's just your perspective when viewing from above. When viewed from underneath the faucet, where the aerator is screwed in, the threading is normal. Remember the tip "righty-tighty" to screw it on and "lefty-loosey" to screw it off).
The Spruce / Kevin Norris
-
Heat the Aerator
When pliers don't work, you can try applying heat. Only try this step if you know your aerator has no plastic parts. Heat can melt or damage plastic and rubber washers. If you are not sure, apply heat in moderation.
- Applying gentle heat using a hairdryer may slightly expand the metal and make it possible to loosen it with pliers.
- Or, try lighting a match and hold it near the aerator to loosen the metal.
The Spruce / Kevin Norris
-
Apply Penetrating Oil
If heat fails, try penetrating oil (such as WD-40 or a similar product).
- Spray the oil on the threads and let it sit for a few minutes.
- Wipe off oil from the surface of the aerator before trying to unscrew it because oil makes the metal slippery.
- Try again to unscrew with pliers.
The Spruce / Kevin Norris
-
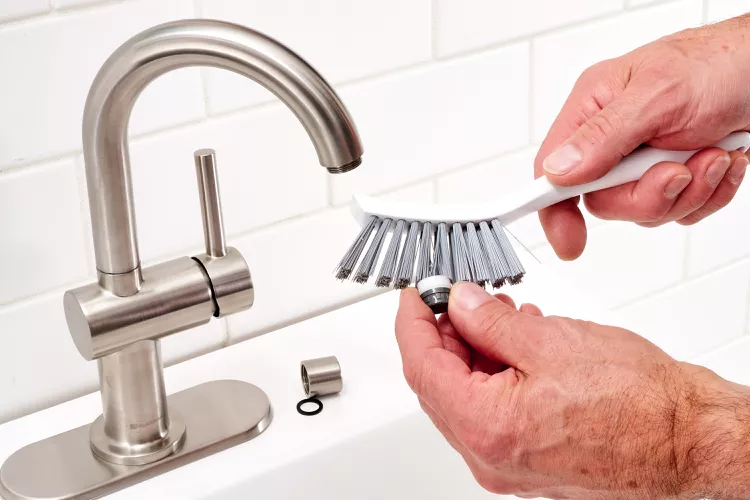
Clean the Aerator
Once the aerator is removed, separate the parts and note their arrangement. An aerator can have many small parts that must go back together in the same way to function correctly.
- Use a small stiff brush to remove grit or mineral deposits from the screen and other parts of the aerator assembly.
- Soak the parts overnight in a lime-dissolving solution, such as Lime-Away, if there is substantial mineral buildup.
Upon unscrewing the aerator assembly, instead of trying to remember how it came off, take photos of the order of the pieces to make it easier to put them back together.
The Spruce / Kevin Norris
-
Replace the Aerator if Necessary
Buy a replacement aerator assembly if the metal screen or other parts are rusted or damaged. Various aerator heads are available, including swivel-head types that improve the faucet's functionality.
The Spruce / Kevin Norris
-
Reassemble the Faucet
- Reassemble the aerator, orienting the parts in the same way you found them when you removed it, and then screw it onto the faucet spout.
- Hand-tightening is usually sufficient, but if you notice leaking around the aerator threads when you test the faucet, tighten the aerator using channel-type pliers.
:max_bytes(150000):strip_icc():format(webp)/removing-a-faucet-aerator-2718836-01-cf61bd145ced4ef0b5451f76f08d134f.jpg)
:max_bytes(150000):strip_icc():format(webp)/removing-a-faucet-aerator-2718836-02-9280a2c1a07f448c9d4f1f1511f84446.jpg)
:max_bytes(150000):strip_icc():format(webp)/removing-a-faucet-aerator-2718836-03-a8833564d5274dc6945ed25b7ad0893f.jpg)
:max_bytes(150000):strip_icc():format(webp)/removing-a-faucet-aerator-2718836-04-c7746041c77c4132b690ad7869767811.jpg)
:max_bytes(150000):strip_icc():format(webp)/removing-a-faucet-aerator-2718836-05-2678aa4fe3394632ad7f1689b2ffb314.jpg)
:max_bytes(150000):strip_icc():format(webp)/removing-a-faucet-aerator-2718836-06-2d4711dfca0f4e78b03f998f1006113e.jpg)
:max_bytes(150000):strip_icc():format(webp)/removing-a-faucet-aerator-2718836-07-232c6342214a4de2b110311d65bea154.jpg)