

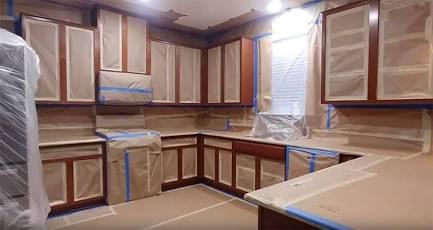
Few interior design projects offer the immediate, jaw-dropping satisfaction of a fresh coat of paint—especially in the heart of the home. If your current kitchen feels tired, dark, or hopelessly stuck in a past decade, you don't necessarily need to drop a fortune on a full structural gut job. A meticulously executed paint transformation can breathe new life into the space at a fraction of the cost of new cabinetry and countertops.
Interestingly, painting a kitchen is completely different from painting a sprawling living room or a long hallway. While those spaces feature vast, uninterrupted expanses of drywall, your kitchen walls are largely interrupted by base units, upper cabinets, major appliances, large windows, and tile backsplashes. This means you actually have far less physical surface area to coat.
However, because the kitchen is a high-traffic zone prone to airborne grease, cooking splatters, and moisture, the square footage you do paint requires meticulous preparation. Let’s break down exactly how to pull off a flawless, professional-grade kitchen paint job on your own.
The Project Blueprint
Before picking up a brush, it helps to understand the scope, timeline, and financial investment required for a standard space (modeled around a classic 10-foot by 10-foot footprint).
| Project Element | Expectation |
| Active Labor Time | 4 to 6 hours of actual rolling and brushing |
| Total Duration | 1 to 2 days (accounting for mandatory drying intervals) |
| Difficulty Level | Beginner-friendly |
| Financial Investment | $200 to $400 (depending on paint grade and tools purchased) |
| Project Yield | A completely refreshed 100-square-foot kitchen |
The Master Checklist: Everything You Need
Don't let a mid-project run to the home improvement store break your momentum. Gather these essential tools and materials before you open your first paint can.
Hardware & Application Tools
-
Premium 2-1/2-inch angled sash paintbrush (essential for crisp edge lines)
-
Sturdy 9-inch roller frame with a comfortable extension pole grip
-
(3) High-quality, low-lint 3/8-inch nap roller covers
-
Heavy-duty metal paint tray
-
(3) Disposable plastic paint tray liners (for effortless cleanup)
-
(2) Thick canvas drop cloths (far superior to plastic underfoot)
-
NIOSH-approved dust mask or dual-cartridge respirator
-
Shop vacuum with a brush attachment
-
Sticky tack cloths for picking up microscopic dust particles
-
Soft, lint-free cotton rags
Core Materials
-
(2) Gallons of premium interior acrylic-latex paint (Satin or Eggshell finish)
-
(1) Gallon of high-adhesion, stain-blocking interior primer
-
(4) Packs of pre-taped masking film or lightweight plastic sheeting
-
(1) Roll of high-quality, medium-adhesion painter's tape
-
(1) Box of trisodium phosphate (TSP) powder or a green, phosphate-free degreasing alternative
Strategy & Material Selection
Demystifying Kitchen Paint Sheens
Choosing the correct paint sheen in a kitchen is paramount to the longevity of your walls. While matte or flat finishes look beautiful in low-traffic bedrooms because they hide drywall imperfections, they are disastrous in a cooking environment. Flat paint acts like a sponge for grease and water spots, and scrubbing it will burnish the finish, leaving permanent shiny patches.
Conversely, high-gloss paint is incredibly durable but reflects so much light that it highlights every single ding, dent, and wavy seam in your walls.
The sweet spot lives directly in the middle:
-
Eggshell: Provides a soft, low-sheen finish that hides minor imperfections while offering decent wipeability. Ideal for dining areas or walls furthest from the stove.
-
Satin: The gold standard for busy kitchens. It offers a subtle pearl-like luster, resists moisture beautifully, and stands up to frequent wiping down with damp cloths.
-
Semi-Gloss: Highly reflective and ultra-durable. This is the optimal choice for baseboards, door trim, window casings, and the specific slivers of wall directly behind sinks or stovetops.
The Science of Surface Prep: What is TSP?
In a typical bedroom, a light dusting is all it takes to prepare a wall for paint. In a kitchen, however, invisible atomized cooking oils settle over every surface, creating a slick, microscopic film of grease. If you attempt to paint directly over this film, the new paint will fail to bond, leading to bubbling, cracking, and premature peeling.
This is where Trisodium Phosphate (TSP) becomes your best friend. TSP is a powerful, heavy-duty alkaline cleaning powder that you mix with warm water. It cuts through baked-on grease, soot, and smoke residues effortlessly, while subtly "etching" the underlying gloss of old paint to create a porous texture that new paint can grip onto.
Safety & Local Regulation Note: Because phosphates can contribute to algae blooms in local waterways if washed down storm drains, several regions have banned or restricted traditional TSP. If you live in one of these areas, look for a dedicated "TSP Alternative" or a heavy-duty butyl-based kitchen degreaser. They work similarly without the environmental downside. Always wear protective gloves and safety glasses when washing walls with these solutions.
Step-by-Step Guide to a Flawless Kitchen Paint Job
To achieve professional-grade results, follow this strict sequential process. Skipping or rushing ahead out of order will compromise your finish.
Navigating Complex Kitchen Architectures
While painting a kitchen is a highly rewarding project for a beginner, it is important to recognize when the architectural layout calls for professional reinforcements.
If your kitchen features towering cathedral ceilings, complex custom crown molding that requires delicate multi-layered masking, or an unusual geometric layout with deeply recessed soffits and hard-to-reach angles over upper cabinets, hiring a licensed painting contractor might save you immense frustration. Professionals possess the specialized scaffolding, long extensions, and airless spraying equipment necessary to navigate tricky high-altitude architectural features safely and seamlessly.