

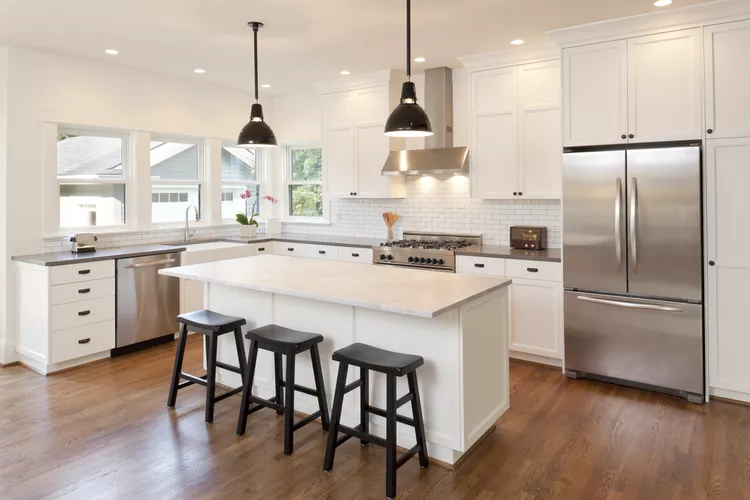
Building a custom kitchen island from scratch using raw dimensional lumber and plywood is a rewarding challenge, but it requires advanced carpentry skills, specialized workshop tools, and a massive investment of time. Fortunately, there is a brilliant shortcut used by smart DIYers and professional contractors alike: building your island out of pre-fabricated kitchen base cabinets.
By using manufactured cabinets as your structural foundation, you completely bypass the tedious process of building perfectly square drawer boxes and hanging doors. Instead, you get to focus on the fun, creative parts of the build—customizing the layout, adding gorgeous trim, and choosing the perfect finish.
This comprehensive guide will walk you through the entire process of transforming standard, off-the-shelf cabinets into a stunning, high-functioning kitchen centerpieces.
Project Specifications
| Metric | Details |
| Active Working Time | 6 to 8 hours |
| Total Project Duration | 1 to 2 days (dependent on paint drying times) |
| Skill Level | Intermediate |
| Estimated Budget | $750 to $1,500 |
| Final Dimensions | 78 inches long by 24 inches wide (customizable) |
Choosing Your Configuration: Layouts and Estimated Costs
The beauty of this project lies in its modularity. Because standard base cabinets are manufactured in widths ranging from 12 to 60 inches, you can mix and match different styles—such as bank-of-drawers cabinets, standard shelf cabinets, or trash-pullout bases—to match your exact lifestyle.
Note: The financial estimates below are calculated using basic, unfinished wood cabinets available at local home improvement warehouses. Custom paint, hardware, countertops, and local taxes will vary.
Common Cabinet Combinations
| Configuration Layout | Length | Depth | Estimated Base Material Cost |
| The Single 60-Inch Block: One continuous sink or storage base | 60 inches | 24 inches | $200 – $250 |
| The Offset Pair: One 30-inch base joined with one 24-inch base | 54 inches | 24 inches | $300 – $350 |
| The Three-Cabinet Trio: One central 30-inch base flanked by two 24-inch units | 78 inches | 24 inches | $450 – $500 |
| The Extended Trio: One central 36-inch base flanked by two 24-inch units | 84 inches | 24 inches | $500 – $550 |
| The Triple Thirty: Three identical 30-inch cabinets placed side-by-side | 90 inches | 24 inches | $450 – $600 |
| The Massive Double-Depth: Six 30-inch cabinets mounted back-to-back | 90 inches | 48 inches | $900 – $1,000 |
Layout Variations to Consider
The Multi-Drawer Hub (78" to 84")
This is the primary layout featured in this guide. By taking a wide central cabinet (typically designed for a sink, offering excellent open storage) and anchoring it with a multi-drawer base cabinet on each side, you create a symmetrical, highly balanced workstation. This offers a mix of deep drawer space for pots and pans and open shelving for larger appliances.
The Minimalist Single-Box Island (60")
If you are dealing with a more compact kitchen layout, a single 60-inch base cabinet is incredibly efficient. Because it is one solid unit, it eliminates the need to join separate face frames together, which simplifies the leveling process. The only downside is that you are restricted to a single row of forward-facing storage.
The Double-Sided Back-to-Back Island (48" Deep)
If your kitchen floor plan resembles a sprawling ballroom, placing cabinets back-to-back creates a massive, furniture-grade focal point. This setup gives you functional doors and drawers on both sides of the island. However, keep in mind that a 48-inch deep island will require a custom-fabricated countertop, as standard retail slabs will not be wide enough to cover the footprint.
Safety Warning: Fully assembled wooden cabinets are deceptively heavy and awkward to maneuver. A standard 60-inch base cabinet can easily weigh over 100 pounds. Never attempt to lift or orient these units alone; always work with a partner, or utilize a heavy-duty hand truck and moving blankets to protect your kitchen floors.
The Master Checklist: Tools and Materials
Before making your run to the lumberyard, ensure you have gathered all the necessary gear. Having the right tools on hand will keep the momentum going once you start building.
Required Tools
-
Power drill and driver set
-
Electric miter saw (for fast, accurate trim cuts)
-
Pneumatic or cordless brad nailer
-
Handheld miter saw (for delicate, fine trim adjustments)
-
Precision bubble level (48-inch level preferred)
-
Claw hammer
-
Standard tape measure
-
Countersink drill bit
-
Heavy-duty C-clamps (minimum of 4, preferably 8)
Required Materials
-
(1) 30-inch wide base cabinet
-
(2) 24-inch wide base cabinets
-
(2) Finished cabinet end panels (matching your cabinet style)
-
(2) 8-foot two-by-four ($2\times4$) structural lumber boards
-
(23 sq. ft.) 1/2-inch thick shiplap planks for the rear backing
-
(1) Outside corner wood molding strip ($11/32\text{-inch} \times 96\text{-inches}$)
-
(3) Pieces of 3-1/4-inch tall by 8-foot long decorative baseboard molding
-
Package of tapered wood construction shims
-
Roll of high-adhesion painter's tape
-
Boxes of 2-1/2-inch and 3-inch premium wood screws
-
Strips of 5/8-inch and 3/4-inch brad nails
Step-by-Step Installation Guide
Step 1: Chart Your Space and Test the Footprint
The key to a successful kitchen renovation is prioritizing structural flow and movement. Grab your tape measure and calculate the complete square footage of your open floor space, making sure to measure from the outermost edges of your existing perimeter countertops rather than the walls.
┌────────────────────────────────────────────────────────┐ │ MINIMUM CLEARANCES │ ├───────────────────────────┬────────────────────────────┤ │ Single-Cook Workspace │ 42 Inches of Open Walkway │ ├───────────────────────────┼────────────────────────────┤ │ Multi-Cook Workspace │ 48 Inches of Open Walkway │ └───────────────────────────┴────────────────────────────┘ An excellent design rule of thumb is that your finished island should never occupy more than 10% of your total kitchen area. Furthermore, ensure you maintain a minimum clearance of 42 inches (for single-cook households) or 48 inches (for multi-cook environments) between the island and your perimeter appliances. This ensures that oven doors, dishwashers, and refrigerators can swing fully open without causing a structural bottleneck.
Step 2: The Painter's Tape Mockup
Before spending a dime on cabinets, map out the exact footprint of your future island on your kitchen floor using painter's tape. If you intend to add a breakfast bar with seating, map out an additional line to account for the standard 15-inch countertop overhang.
To take your spatial visualization to the next level, gather some empty Amazon or appliance boxes, stack them inside the taped boundaries, and walk around them for a day or two. This will give you a tactile feel for how the island will impact the natural flow of your room. Don't forget to order matching finished end panels to conceal the raw plywood sides of your outer cabinets!
Step 3: Pre-Finishing, Painting, or Staining
If you went the budget-friendly route and purchased raw, unfinished wood cabinets, save yourself future headaches by painting or staining them before they are anchored to the floor. Set up a dedicated workspace in a clean, well-ventilated garage or patio.
Remove the cabinet doors, drawer fronts, and internal hardware entirely. Paint both the front and back surfaces of the doors and drawer faces, along with the exterior structural frames. There is no need to paint the internal shelves or inside the cabinet boxes unless you prefer that look. Don't forget to pre-paint your corner trims and baseboard moldings at this stage as well.
Step 4: Component Prep and Dry Fitting
If your cabinets arrived as flat-packed, ready-to-assemble (RTA) units, construct the main outer boxes according to the manufacturer's directions. Keep the doors, drawers, and adjustable interior shelving removed for the time being to keep the boxes as light and accessible as possible.
Bring the empty boxes into your kitchen and arrange them in their final configuration directly over your taped outline. This "dry fit" allows you to double-check that your layout works exactly as intended.
Design Tip: To visualize your final countertop before ordering an expensive slab, lay a few sheets of 2-inch thick rigid foam insulation boards over the dry-fitted cabinets. Cut the foam to include your intended overhangs to preview the final profile.
Step 5: Anchor the Floor Cleats
Tip the dry-fitted cabinets backward to inspect their undersides. You will notice that the bottom floor of a base cabinet sits a few inches higher than the lowest edge of the outer walls, leaving a hollow cavity underneath. Measure the internal dimensions of this recessed space.
Cut your $2\times4$ framing lumber to match these internal dimensions. Place these wooden blocks (cleats) flat against your subfloor, positioning them exactly 1/2-inch inward from your original layout line to account for the thickness of the cabinet's outer walls. Secure the $2\times4$ cleats permanently to your kitchen floor using heavy-duty 3-inch structural screws.
Step 6: Leveling and Squaring the Core
Set your cabinet boxes back down over the floor cleats, ensuring they are ordered correctly. Grab your C-clamps and tightly lock the face frames of the adjacent cabinets together. Your goal is to create a seamless, perfectly flat run across the top of the units.
Place your 48-inch bubble level across the top edges. Because residential floors are rarely perfectly flat, you will likely need to slide tapered wood shims beneath the cabinet bases to raise low spots. Gently tap the shims into place using a hammer until your bubble level reads perfectly true both from left-to-right and front-to-back.
Step 7: Securing the Island Base
With the cabinets perfectly leveled and held tight by your clamps, it's time to anchor them down permanently. Slide your drill inside the cabinets and locate the lower internal frame adjacent to the floor cleats. Using a countersink bit, drill pilot holes through the cabinet structure and down into the $2\times4$ cleats.
Drive 2-1/2-inch wood screws through the pilot holes and deep into the cleats—aiming for two screws in the front wall and two in the rear wall of each cabinet unit. Using the countersink bit ensures the screw heads sit perfectly flush with the wood, which prevents them from interfering with your exterior trim pieces later on.
Step 8: Uniting the Face Frames
To turn these separate cabinets into a single, cohesive unit, you must fasten them together through their solid wood face frames. Working from the inside of your cabinets, drill a 1/8-inch pilot hole through the side edge of the front face frame. Position these holes subtly above or below the door hinges to keep them hidden from plain view.
Face Frame Joint Detail Adjacent Cabinet Frame ┌──────────┐┌──────────┐ │ ││ │ │ ││ Pilot │ Drive 2-1/2" ─────>│ ┌──────┐ ││ Hole │ Screw Through │ │ │ ││ │ │ Countersunk Hole │ └──────┘ ││ ▼ │ │ ││ │ └──────────┘└──────────┘ Use your countersink bit to create a clean recess for the screw head. Drive a 2-1/2-inch wood screw firmly through one face frame and into the adjacent one.
Important Carpentry Note: Never try to connect cabinets by screwing through the thin plywood side panels. The structural strength of a cabinet lives entirely within its thick, solid wood face frame. Joining them anywhere else will result in a weak, unstable island.
Step 9: Trimming Shims and Wrapping the Edges
Take a hand-held miter saw, a Japanese flush-cut pull saw, or a mechanical oscillating multi-tool to slice away the excess lengths of the wood shims protruding out from under the cabinets. Work slowly and keep the blade flat against the floor to avoid gouging your kitchen tile or hardwood.
Next, grab your pre-finished cabinet end panels. Apply a generous bead of high-quality construction adhesive across the raw plywood sides of your outermost island cabinets. Press the end panels firmly into place and secure them around the perimeter using your pneumatic nailer loaded with 3/4-inch brad nails.
Step 10: Installing the Shiplap Backing
Because standard base cabinets feature a functional front but an unpolished, plain back wall, you need to dress up the rear side of the island that faces your living or dining area. Shiplap planks provide an elegant, clean look.
Start at the very bottom of the island's back wall. Using your electric brad nailer and 5/8-inch or 3/4-inch brads, secure your first row of shiplap horizontally. Leave a minuscule 1/4-inch expansion gap between the bottom plank and the floor. Work your way upward, interlocking the tongue-and-groove profiles of the planks until you reach the top edge of the cabinets.
If your final top row of shiplap is too wide, use a table saw or circular saw to "rip" (cut lengthwise) the board down so it sits roughly 1/4-inch below the top edge of the cabinet frame. Don't worry about this minor gap; your final countertop overhang will conceal it completely.
Step 11: Baseboard and Corner Molding Integration
Measure the lower toe-kick area along the front, back, and sides of your newly formed island. Using your electric miter saw, cut your 3-1/4-inch decorative baseboard molding to length, utilizing clean 45-degree miter joints at the corners for a professional, wrapped appearance. Fire 5/8-inch brad nails through the molding to lock it securely against the cabinet base.
Next, measure the vertical distance from the top of your newly installed baseboard molding up to the top lip of the cabinet frame at the two rear corners. Cut your $11/32$-inch outside corner molding to match this exact height. Affix the corner trim pieces using 3/4-inch brads to elegantly mask the exposed cut edges of your shiplap planks.
Step 12: Door Realignment, Hardware, and Shelving
With the structural island complete, re-hang your painted cabinet doors and slide the drawer tracks back into place. To ensure your new hardware pulls and decorative knobs look perfectly symmetrical, use a laser level or snap a chalk line across the faces of your drawers.
Drill your mounting holes using the specific bit size recommended by your hardware manufacturer. Thread the installation screws through from the inside of the drawers, align your modern handles or knobs on the outside, and tighten them down using a manual screwdriver to avoid over-stripping the threads. Finally, drop your interior support pegs into their designated holes and slide in your shelves.
The Finishing Touch: When to Call the Pros
Congratulations—the structural foundation of your brand-new kitchen island is officially complete! At this stage, you face a choice regarding the final countertop installation.
If you like the warm, organic aesthetic of a thick wood butcher block countertop, you can easily purchase a pre-cut slab from a home center, trim it to size with a circular saw, sand it smooth, seal it with food-safe oils, and screw it down from inside the cabinet frames yourself.
However, if your design calls for premium, heavy materials like quartz, granite, solid marble, or soapstone, it is highly recommended to call in professional fabricators. These luxury materials require highly specialized water-cooled diamond saws, precise templating tools, and heavy-duty crew lifting power to ensure the material is cut, polished, and installed without cracking or compromising your hard work.