

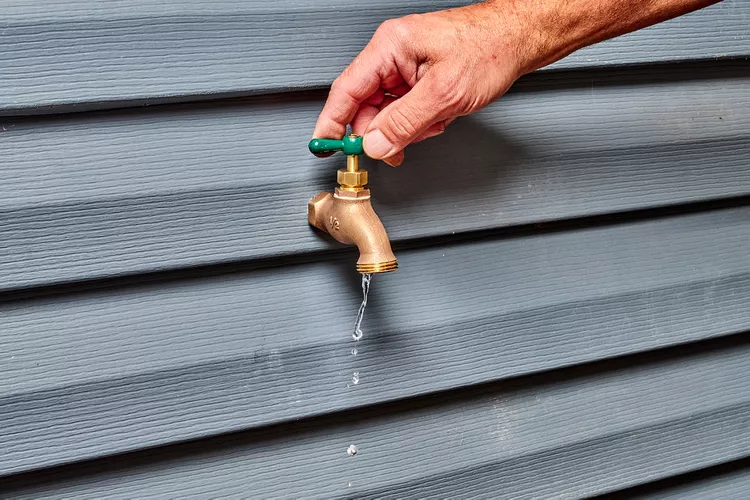
Hose Bib Repair Guide
While modern indoor plumbing has largely transitioned to slick, low-maintenance ceramic cartridge valves, your home's exterior utility line relies on a rugged, old-school mechanism. The outdoor faucet—known in the trades as a hose bibb or sillcock—is an entirely different mechanical system. These hard-working exterior valves spend their lives braving harsh environments: extreme summer heat, winter freezes, and sudden temperature shifts. Because they are designed to handle high volumetric water pressure and tolerate dirt, sand, and mineral deposits without failing, they still utilize a classic compression-style design.
Unfortunately, because these fixtures live outside, homeowners frequently ignore a slow leak. A weeping spigot is often dismissed as a minor issue since the escaping water falls onto the ground rather than onto a bathroom floor. This is a costly mistake. An outdoor leak can silently waste thousands of gallons of water over a single summer, drive up your utility bills, and saturate the soil directly against your home’s foundation. Over time, this chronic water pooling can seep through foundation cracks, ruin exterior basement waterproofing, and attract wood-boring pests.
Fortunately, you do not need to call an expensive professional to swap out the entire fixture when it starts to fail. A leaking hose bibb is almost always caused by the degradation of two inexpensive interior components: a rubber washer or a few inches of protective packing twine. With a basic set of tools and less than an hour of focused work, you can easily restore your outdoor valve to perfect working order.
Technical Project Specifications
| Parameter | Metrics |
| Active Working Window | 30 to 45 minutes |
| Total Project Duration | 45 minutes |
| DIY Skill Requirement | Beginner |
| Estimated Material Cost | $5 to $10 |
Anatomy of an Exterior Compression Valve
To successfully diagnose and repair a hose bibb, it helps to understand the physical mechanics operating inside the cast-brass housing. A traditional hose bibb controls water flow using a heavy, threaded brass shaft called the valve stem.
At the base of this stem sits a flat or slightly beveled rubber or neoprene compression washer, secured tightly by a small brass screw. When you rotate the exterior handle clockwise, you are mechanically driving the stem down into the valve body. This action forces the rubber washer flat against a smooth, circular metal rim called the valve seat. The physical pressure of the rubber sealing against the metal seat blocks the incoming water line completely.
To keep pressurized water from traveling upward along the spinning stem and spilling out from beneath the handle, the top of the valve body is packed with specialized graphite-coated or Teflon-infused string, or compressed behind a dense fiber washer. This packing material is held under constant pressure by a large, hexagonal nut known as the packing nut or bonnet nut. When a leak occurs, water will typically present itself in one of two distinct zones, pinpointing exactly which part has failed:
-
The Spout Leak: If water constantly drips or streams out of the main garden hose opening even when the handle is turned completely off, the internal compression washer has flattened out, cracked, or dry-rotted, preventing a flush seal against the valve seat.
-
The Handle Leak: If water seeps, weeps, or sprays out from directly beneath the handle assembly while the faucet is turned on, the internal packing string has compressed, degraded, or washed away, allowing water to escape past the stem.
The Pre-Repair Tool Assembly
Before you disrupt your home's water supply, gather a few essential hand tools and replacement materials:
-
Adjustable Wrench or Channel-Lock Pliers: Essential for backing off the heavy brass packing nut without marring the metal facets.
-
Multi-Bit Screwdriver: Needed to remove the handle retention screw and the interior washer screw.
-
Assorted Faucet Washer Kit: A small multi-pack containing various sizes of flat and beveled neoprene washers (typically ranging from 1/4-inch to 1/2-inch trade sizes).
-
Graphite or Teflon Packing String: A spool of lubricated, heavy-duty plumbing twine used to create a custom water barrier around the stem.
-
Microfiber Cleaning Cloth: To clean out debris, rust flakes, and mineral deposits from inside the valve body.
Step-by-Step Valve Restoration Sequence
🛑 CRITICAL REPAIR WARNING: AVOID WALL TORSION
Exterior pipes are often soldered to thin copper lines hidden inside your home's wall cavity. When you place a wrench on an outdoor spigot and apply heavy physical force to break a stuck nut loose, you can easily twist the entire faucet assembly. This torsional stress can snap the internal plumbing lines clean off inside your walls, transforming a simple 10-minute repair into an expensive, structural piping emergency. Always use a two-wrench technique: grab the main brass body of the spigot firmly with one wrench to hold it completely stationary, and use your second wrench to rotate the packing nut.
The Execution Workflow
Testing and System Calibration
With the spigot fully reassembled, close the exterior handle completely by turning it clockwise until you feel the new rubber washer compress firmly against the internal metal seat.
Head back indoors and slowly open your main water isolation valve to restore full hydrostatic pressure to the line. Walk back outside and inspect the fixture closely.
┌─────────────────────────────┐ │ RESTORE WATER PRESSURE │ └──────────────┬──────────────┘ │ ▼ ┌─────────────────────────────┐ │ INSPECT THE OUTDOOR FIXTURE │ └──────────────┬──────────────┘ │ ┌─────────────────────┴─────────────────────┐ ▼ ▼ ┌─────────────────────────────┐ ┌─────────────────────────────┐ │ LEAK DETECTED AT STEM │ │ NO LEAKS / DRY ASSEMBLY │ ├─────────────────────────────┤ ├─────────────────────────────┤ │ Give the packing nut a tiny │ │ Turn valve on/off to verify │ │ 1/8-turn clockwise tweak. │ │ smooth mechanical travel. │ └─────────────────────────────┘ └─────────────────────────────┘ If you notice a slight weep or droplet forming directly beneath the packing nut while the valve is open, don't worry. This simply means the new packing string needs a bit more compression to form an airtight seal. Take your adjustable wrench and give the packing nut a small 1/8-turn clockwise tweak until the weeping stops completely. Cycle the handle on and off several times to ensure the internal stem travels smoothly without binding.
When to Condemn the Fixture
While a washer replacement solves the vast majority of spigot problems, certain physical failures cannot be repaired with basic maintenance items. If you remove the internal stem and inspect the interior faucet body with a flashlight only to find that the circular brass valve seat is heavily cracked, deeply pitted from mineral scale, or scored by decades of water friction, a new rubber washer will not work. The rough, uneven metal surface will quickly slice through the fresh rubber, causing the leak to return within days.
Additionally, if the exterior cast-brass body shows hairline fractures along the casing—often caused by water freezing inside the spigot over a cold winter—the structural integrity of the metal has been compromised. In these scenarios, the only permanent, safe solution is to cut the old fixture completely out of the supply line and install a modern, self-draining frost-proof wall hydrant in its place.