

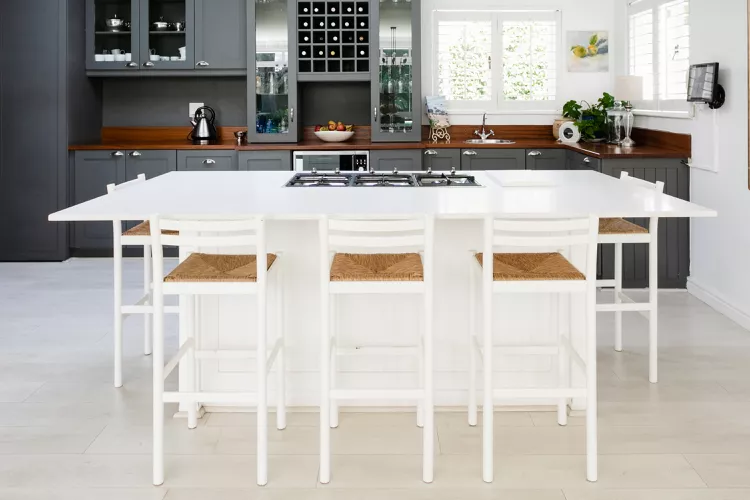
A kitchen island is easily the hardest-working focal point in a modern home. It serves as a prep station, a social hub, a dining table, and a storage vault all rolled into one. However, it is remarkably easy to get the design wrong. If it is too massive, it becomes a structural roadblock that disrupts the entire room; if it is too small, it looks lost and loses its functional value.
Designing the perfect kitchen island is an exercise in balancing spatial mathematics with daily utility. From mapping precise walkway clearances to routing gas lines through a foundation, creating a highly functional kitchen island requires careful planning. Let's look closer at the essential dimensions, spacing guidelines, and utility integrations needed to design a beautiful, hard-working feature for your home.
The Spatial Formula: Finding Your Maximum Island Footprint
Before choosing cabinet doors or luxury stone countertops, you need to understand how much physical space your kitchen can actually spare. The number one mistake homeowners make is assuming that a bigger island is always better. In practice, an oversized island chokes off the room's energy and makes daily tasks incredibly frustrating.
As a solid baseline, a permanent kitchen island should occupy no more than 10% of your kitchen's total usable square footage. Going beyond this threshold runs a severe risk of visually overwhelming the room and cutting off natural pathways.
To see this math in action, let's contrast a poorly proportioned layout with a balanced one:
-
The Overcrowded Layout: Imagine a kitchen that measures 10 feet by 13 feet, giving you a total footprint of 130 square feet. If you drop a massive 4-foot by 7-foot island (28 square feet) right in the center, that single piece of furniture devours more than 21% of the floor space. It turns the room into a cramped obstacle course.
-
The Well-Proportioned Layout: Take that same 130-square-foot kitchen and adjust the island's dimensions to 2 feet wide by 7 feet long. Now, the module occupies 14 square feet—tipping the scales at just under 11% of the total space. The kitchen instantly opens up, providing plenty of breathing room while still offering a generous, elongated workstation.
Prototyping in the Real World
If you are having trouble visualizing how a specific footprint will feel, try building a physical prototype before committing to construction.
Clear out your kitchen space and set up a basic folding table or a couple of cardboard boxes matching the intended length and width of your future island. You can expand the surface area by taping flat sheets of cardboard to the top, and adjust the assembly to standard counter height by placing books under the legs. Leave this mock-up in place for a few days. Walk around it, open your surrounding refrigerator and dishwasher doors, and cook around it. This simple test will quickly reveal if your layout feels natural or overly cramped.
Architectural Clearances and Seating Dimensions
An island doesn't exist in a vacuum; its design is completely dependent on the surrounding perimeter cabinets. To keep your kitchen moving smoothly during busy morning routines or dinner parties, you must respect the physical clearances required for human movement.
1. The Clearance Zone (Work Aisles)
For a comfortable, uninhibited pathway, aim for a work aisle width of 42 to 48 inches between the absolute outermost edge of your island countertop and the faces of your perimeter cabinets.
A 42-inch clearance works well for single-cook households, allowing you to pivot from one counter to another effortlessly. If you frequently cook with a partner or have kids running through the space, stepping up to a 48-inch clearance ensures that two people can pass each other without awkward maneuvering, and allows large appliance doors (like your dishwasher or oven) to open fully without blocking traffic.
2. Vertical Profiling (Height Standards)
The standard architectural height for a working kitchen counter is 36 inches from the finished floor. If your primary goal is to maintain a flat, expansive, uninterrupted prep surface, keep the entire island flat at this height.
However, if you want to visually shield your cooking prep area from a nearby living room or create a distinct casual dining zone, you can transition to a tiered, dual-level configuration. The dining section typically steps up to 42 inches tall, matching standard commercial bar heights.
3. The Anatomy of Comfortable Seating
If you plan to incorporate a seating overhang, avoid crowding your guests. Every stool requires a specific amount of horizontal and vertical space to keep people from bumping knees and elbows.
-
Linear Seating Width: Allocate 22 to 24 inches of lateral space per person. For example, a modest 4-foot-long (48-inch) island can comfortably accommodate two stools. If you are working with a standard 7-foot-long (84-inch) to 8-foot-long (96-inch) island, you can comfortably line up three to four stools without making guests feel squeezed together.
-
The Knee Overhang Depth: To sit comfortably without slouching, your countertop needs a structural cantilever. For a standard 36-inch-high island counter, ensure the countertop extends a minimum of 12 inches past the base cabinets (though 15 inches is preferred for taller individuals) to provide ample legroom.
The Workflow Blueprint: Honing the Work Triangle
A beautiful kitchen island is useless if it ruins the fundamental workflow of your kitchen. For decades, kitchen design has relied on the concept of the Work Triangle—a geometric system that tracks the physical distance between the three most heavily used elements in the room:
-
The Refrigerator (Storage)
-
The Main Sink (Prep & Cleaning)
-
The Cooktop or Range (Cooking)
When laying out your floor plan, make sure the island doesn't act as a giant wall right in the middle of these three points. Ideally, no single leg of the work triangle should be shorter than 4 feet or longer than 9 feet. The total combined perimeter of the triangle should ideally fall between 12 and 26 feet.
If your island forces you to constantly walk around it just to get an onion from the fridge to the sink, the layout needs to be adjusted.
Plumbing Engineering: Integrating a Prep Sink
If you want to shift your primary cleaning zone to the perimeter wall but still face your guests while prepping food, adding a secondary bar or prep sink to the island is an excellent design choice.
| Component Metric | Standard Target Dimension | Functional Rationale |
| Prep Basin Width | 9 to 18 inches | Compact enough to preserve counter space, large enough for washing produce. |
| Minimum Island Length | 7 feet | Essential to ensure the sink doesn't swallow up the entire surface. |
| Lateral Buffer Space | 18 to 24 inches | Required on at least one side of the basin for staging bowls and chopping boards. |
The Below-Floor Challenge
Adding a water fixture to a freestanding island requires careful planning for the utilities beneath the floor. Unlike perimeter cabinets where pipes are hidden inside the wall, an island's plumbing—both the pressurized hot and cold water supply lines and the gravity-fed wastewater drain line—must run vertically up through the floor.
If your home features a crawlspace or a basement, accessing this plumbing is straightforward for a licensed technician. However, if your house is built directly on a solid concrete slab foundation, the installation becomes much more invasive. Contractors will need to use jackhammers to trench out a channel across your concrete floor, lay down the sloped drainage piping, and pour fresh concrete over the area before installing your final flooring.
High-Heat Stations: Island Cooktops and Ventilation
Moving the primary cooktop or stove to the center of the room turns cooking into an engaging, social activity. Instead of facing a blank wall with your back to the room, you can chat with family or guests seated right across the counter.
Much like adding a sink, placing a range on an island requires bringing your energy infrastructure—either high-voltage electrical lines or dedicated gas pipes—up through the floor. The bigger challenge here, however, is figuring out how to handle the smoke, airborne grease, and intense heat generated by cooking. You have two main options for ventilation:
Option A: Upward Venting (Ceiling Hoods)
This method utilizes a traditional island range hood anchored directly to your ceiling joists above the cooktop. Steam and grease rise naturally, making this configuration highly efficient at clearing the air.
The downside is purely visual: a large metal hood hangs down in the middle of the room, which can disrupt an open-concept sightline. Make sure to choose a clean, sculptural hood that complements your kitchen's style without feeling too heavy.
Option B: Downward Venting (Downdraft Systems)
If you want to keep your sightlines completely open, a downdraft ventilation system is an elegant alternative. These systems pull smoke and odors downward, drawing air through a slim slot next to the burners and venting it out through ductwork running beneath the floor.
While this setup looks incredibly clean, it has to fight against the natural tendency of hot air to rise. As a result, downdraft vents are rarely as powerful as overhead hoods and can struggle to capture steam from tall stockpots.
Electrical Code Compliance and Safety
Because kitchen islands are surrounded by open space, they present a unique safety hazard: dangling power cords. If you place a toaster or a slow cooker on an island without an integrated power outlet, you might be tempted to run an extension cord across the walkway—creating a major tripping hazard that could pull hot appliances off the counter.
To prevent this, the National Electrical Code (NEC) enforces strict regulations regarding island receptacles. Even if you don't think you will use plug-in appliances on your island, modern building codes frequently require built-in outlets if the island exceeds a certain size.
The Surface Area Math: Under standard residential electrical codes, your island's power requirements are determined by the overall size of its countertop. The initial 9 square feet of countertop area requires at least one dedicated outlet receptacle. From there, you must add an additional outlet for every additional 18 square feet of space.
Let's look at how this applies to a large island:
-
Imagine a spacious island measuring 5 feet wide by 9 feet long, giving you a 45-square-foot countertop.
-
The first 9 square feet accounts for Outlet #1.
-
The remaining 36 square feet is divided by 18, which equals exactly 2. This requires an additional two outlets.
-
Therefore, this island requires a minimum of three separate electrical outlets to satisfy code compliance.
Furthermore, because these outlets sit near high-moisture prep zones and potential sink splash areas, every single receptacle servicing the countertop must be GFCI-protected (Ground Fault Circuit Interrupter) to instantly shut down power in the event of an electrical short.
Smart Storage Architecture: Maximizing the Base Cabinets
The base of your kitchen island offers a fantastic amount of storage real estate, but it needs to be organized thoughtfully. If you simply install standard, deep base cabinets with basic swinging doors, the interior can quickly become a dark, disorganized mess where pots and pans get lost in the back.
Instead, prioritize specialized cabinet organizers to maximize the functionality of every square inch:
-
Deep Tiered Drawers: Swap out standard base doors for heavy-duty, deep drawer glides. Pulling a drawer out allows you to look straight down at your entire collection of heavy cast-iron skillets or baking dishes, eliminating the need to get down on your knees to search through a dark cabinet.
-
Integrated Trash & Recycling Pull-outs: The island is your primary food preparation zone, making it the perfect spot for a concealed, dual-bin trash and recycling drawer. Placing this directly beneath your cutting board area allows you to sweep food scraps straight into the bin in one easy motion.
-
Vertical Tray Dividers & Lazy Susans: Utilize narrow, vertical slots to store flat baking sheets, cutting boards, and serving platters on edge. For deep corner transitions on L-shaped islands, an internal lazy Susan or a pull-out tray system ensures that items tucked deep into the corner remain easily accessible.
The Hybrid Setup: Permanent Bases with Rolling Modules
If you are working with a slightly smaller kitchen and don't quite have the room to install a massive permanent structure, consider a hybrid approach. You can build a modest, fixed central island to house your core storage and electrical needs, and supplement it with a separate, mobile freestanding cart.
Choosing a rolling island or a heavy timber butcher-block station equipped with locking industrial casters gives you incredible flexibility. During daily prep work, you can park the mobile unit directly adjacent to your main island to instantly double your available counter space. Then, when you are hosting a large gathering or need extra floor space to move around, simply unlock the wheels and roll the auxiliary cart out of the way against a side wall to open up the room.