

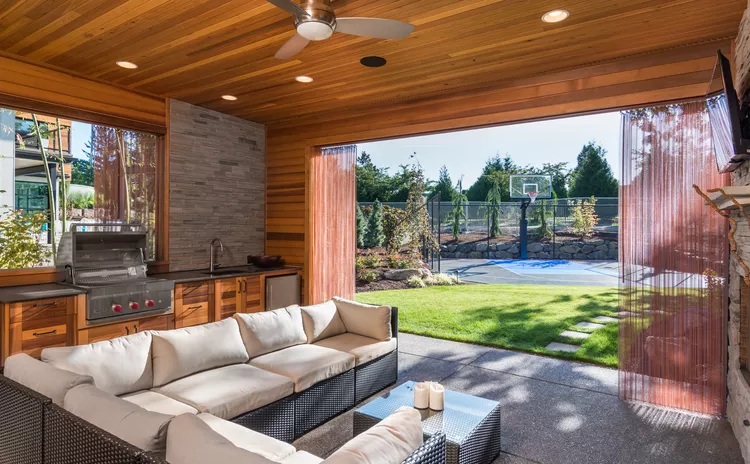
THE COMPREHENSIVE GUIDE TO BUILDING A CUSTOM OUTDOOR KITCHEN
Transforming your backyard into a functional culinary oasis is one of the most rewarding property upgrades you can undertake. Moving the meal preparation process outside changes the entire dynamic of hosting and family dinners. Instead of being isolated in a hot indoor kitchen while your guests chat on the patio, you become the center of the entertainment. Meals go straight from the flame to the plate, retaining their heat and flavor, while the rich aromas of open-air cooking elevate the entire backyard environment.
However, taking on a project of this scale requires realistic planning. A fully integrated outdoor kitchen is a major undertaking that demands a serious time commitment, a healthy budget, and advanced technical skills.
PROJECT SNAPSHOT
Estimated Timeline: Two to three weeks of active construction.
Difficulty Rating: Advanced.
Financial Investment: Three thousand to ten thousand dollars or more.
Project Outcome: A fully functional, weatherized open-air cooking and dining station.
DEFINING THE SPACE: STANDALONE GRILL VS. OUTDOOR KITCHEN
A basic patio setup with a rolling charcoal grill does not quite qualify as a kitchen. The transition to a true outdoor kitchen occurs when you introduce structural permanence and the core conveniences of indoor cooking. This means integrating permanent countertops, dedicated storage cabinets, built-in cooking appliances, and a designated dining area.
High-end variations generally feature dedicated utility hookups, including dedicated electrical lines, gas plumbing, and fully functional sinks with running water and drainage. These spaces are constructed to be permanent fixtures of the landscape, seamlessly blending architectural design with culinary utility.
CRITICAL PRE-CONSTRUCTION CONSIDERATIONS
Your available yard space, financial boundaries, and personal hosting style will ultimate dictate the scope of your build. Before buying materials, you need to establish a clear strategy.
Layout and Budget Scalability
If you host large weekend gatherings frequently and have a flexible budget, it makes sense to design a comprehensive setup. This might include an expansive countertop layout, a built-in multi-burner grill, a side burner, an outdoor-rated refrigerator, a sink, and a permanent roof structure. Conversely, if your outdoor cooking is limited to casual family dinners, you can save money by focusing on the bare essentials first: solid structural cabinets, a durable countertop, and a built-in cooking unit. You can always pre-wire or pre-plumb the island to add luxury appliances like refrigerators or icemakers down the road.
Time and Skill Requirements
Expect to spend a minimum of two to three weeks on physical labor if you plan to manage the build yourself. This project is tailor-made for master-level DIY enthusiasts. Even if you possess excellent carpentry and masonry skills, you will likely need to partner with licensed subcontractors to handle the specialized mechanical phases, such as running high-voltage electrical lines, connecting natural gas lines, or tapping into the home's water supply.
Financial Allocation
A bare-bones, self-built kitchen focusing primarily on framing, basic stone veneer, a quality drop-in grill, and simple counters will cost at least three thousand dollars in raw materials. If you want a luxury configuration featuring premium marine-grade appliances, quartz counters, and utility hookups, the price tag can easily climb past ten thousand dollars. Tackling the labor yourself generally cuts the overall cost by twenty to forty percent compared to hiring a turnkey design-build firm.
Strategic Site Selection
Where you position the kitchen determines how often you will use it and how much it will cost to build. Logistically, keeping the outdoor kitchen close to the main house is highly advantageous. The closer the structure is to the exterior walls of your home, the shorter the distance you have to dig trenches for utility conduits, saving thousands in plumbing and electrical labor.
The build site must be completely dry, level, and structurally stable. Take note of natural elements throughout the day. Look at how sunlight tracks across the yard. Leafy trees can offer welcome afternoon shade, but they also drop sap and leaves onto your cooking surfaces.
Additionally, scan the ground for subterranean obstacles. You must avoid placing the kitchen over active or abandoned septic systems, buried utility mains, or within property easements that restrict permanent structures. Always check your property deed and title before breaking ground.
Navigating Local Codes and Regulations
Outdoor kitchens are bound by strict local building regulations. Introducing gas plumbing and electrical wiring almost always triggers a mandatory municipal permit process. Furthermore, if you plan to build a permanent roof, pergola, or pavilion anchored to the house or set into poured concrete footings, you will need structural approval. Before you pull out a shovel, call your local utility protection hotline by dialing 811. Technicians will visit your property to locate and map out all underground gas, electric, and water lines so you can excavate safely.
Choosing the Right Construction Season
Actual construction requires consecutive days of mild, dry weather. Rain, mud, and extreme midsummer heat will slow down your progress and can ruin fresh masonry or concrete work. If you live in a region that experiences harsh winters, you must avoid working when the ground is frozen, as digging trenches for utility lines becomes nearly impossible.
Aim for mid-to-late autumn or early spring after the ground thaws out completely. If your design includes a heavy overhead roof structure, build that shelter first. This gives you a dry, shaded workspace to build the rest of the kitchen regardless of daily weather shifts.
TOOLS AND MATERIALS REQUIRED
You will need an extensive array of specialized tools and materials depending on the complexity of your design.
Equipment and Tools:
Excavation shovels and trenching spades.
Standard carpentry tools including circular saws, levels, and drills.
Specialized electrical tools for wiring and conduit bending.
Plumbing wrenches and pipe-cutting tools.
Materials:
Subfloor materials such as treated lumber, concrete pavers, or poured masonry.
Corrosion-resistant exterior screws, nails, and framing connectors.
Outdoor-rated electrical cables, PVC conduits, GFCI outlets, and waterproof boxes.
PEX or copper water supply lines and PVC drainage pipes.
Pre-fabricated pergola kits or structural lumber for framing a roof.
Weatherproof cabinetry components.
Outdoor-certified appliances and drop-in grills.
Countertop slabs rated for UV exposure and freezing temperatures.
Exterior dining furniture and social seating.
STEP-BY-STEP CONSTRUCTION PROCESS
Step 1: Establishing a Level, Stable Base
An outdoor kitchen carries immense weight, especially when you factor in heavy stone veneer, concrete counters, and steel appliances. You cannot build directly on bare soil. You must prepare a solid foundation using one of the following methods:
Method A: A Ground-Level Deck. Frame a sturdy wooden platform using pressure-treated lumber. The great advantage of a framed deck is that it creates a crawlspace beneath the floor, allowing you to easily route and conceal utility lines along the structural joists.
Method B: A Poured Concrete or Paver Patio. A solid concrete slab or a base made of stone pavers like flagstone or travertine offers the ultimate in durability. Masonry bases are practically indestructible and provide a rock-solid floor that easily carries the weight of heavy stone kitchen islands.
Method C: A Framed Gravel Pad. For an informal, highly economical approach, you can create a perimeter border using heavy timbers, lay down professional-grade landscape fabric to stop weed growth, and fill the space with tightly packed pea gravel. This works beautifully for casual designs but is less ideal for heavy stone structures.
Step 2: Routing the Mechanical Utilities
Running water, electricity, and gas is often the most expensive phase of the project, and it demands precision.
If your design includes natural gas or running water, the pipes must be buried deep enough to sit below your local frost line to prevent freezing and bursting during the winter. In colder climates, this can mean digging trenches up to four feet deep.
Electrical lines must be fed through protective PVC conduits or consist of approved direct-burial cables buried to legally mandated depths. Unless you are a highly qualified DIYer with a deep understanding of the national electrical code, hire a licensed electrician for this phase.
Plumbing requires careful planning for waste management. In most regions, you cannot simply let wastewater from an outdoor sink drain directly onto the lawn. Plumbing codes usually dictate that sink drains must tie directly back into the primary home drainage system.
You can dramatically lower your project costs by minimizing these utility runs. If you want to keep the budget under control, swap out natural gas lines for a standard propane grill that runs on refillable tanks, and skip the running water sink in favor of a well-placed beverage ice chest. All utility installations must be officially inspected and signed off by local building officials before they are covered up.
Step 3: Erecting the Overhead Shelter
While not strictly mandatory, an overhead canopy makes the space far more usable. In blazing hot climates, a roof provides vital relief from the sun, while in wetter or bugnier regions, a screened enclosure can extend your outdoor dining season by several months. A shelter also serves to visually define the kitchen zone within the wider backyard landscape.
Your shade structure can range from a budget-friendly fabric sailcloth to a sophisticated, fully enclosed gazebo. Pergolas are incredibly popular because you can leave them open to catch the breeze, plant climbing vines for natural shade, or add a retractable fabric canopy. If you want to keep things simple, avoid custom carpentry and purchase a pre-engineered pergola kit that bolts directly down to your existing deck or patio surface.
Step 4: Assembling Cabinets and Counters
Ample counter space and weatherized storage cabinets transform a grill station into a highly versatile cooking environment. When building the framework for your kitchen island, map out exact dimensions for your drop-in grill, side burners, and outdoor refrigerator so the framing leaves precise openings for these units.
Standard indoor cabinetry will quickly rot and warp outside. Instead, build your framing out of heavy-gauge galvanized steel studs covered in cement backer board, or use solid stainless steel cabinetry. You can face the exterior with durable materials like natural stone veneer, stucco, or weather-sealed reclaimed wood.
For the countertops, choose non-porous materials that can withstand intense UV rays, freezing winter cycles, and regular cooking spills. Excellent options include premium natural granite, high-density engineered quartz, marine-grade stainless steel, or custom-poured concrete slabs.
If your kitchen sits inside a fully enclosed, completely weatherproof pool house or sunroom, you gain the freedom to use traditional indoor materials like rich butcher block counters and stained plywood cabinets. Otherwise, stick exclusively to outdoor-rated materials.
Step 5: Finishing Utilities and Drop-in Appliances
With the structural island built and the countertops secured, it is time to wrap up the mechanical elements.
Your electrician will return to install waterproof GFCI outlets to safely power your outdoor refrigerator, rotisserie motors, or blenders. This is also the time to hook up exterior landscape lighting, accent LED strip lights under the counter lip, or install an outdoor-rated ceiling fan underneath your pergola.
Next, the plumber will complete the final connections for the water supply lines, faucet, and gas connections. Once all mechanical connections are completed, a final inspection from your local code enforcement officer is usually required to officially close out the building permits. After receiving final approval, you can slide your appliances into their designated slots, hook up the final gas fittings, plug in the power cords, and test the system.
Step 6: Outfitting the Social Zone
Bring the entire project together by turning the surrounding space into an inviting dining area. Add a durable outdoor table, comfortable chairs, or built-in bench seating. Depending on your climate, you can maximize comfort by installing commercial-grade patio heaters, a built-in fire pit, or motorized insect screens.
Personalize the space with finishing touches that reflect your lifestyle. Consider laying down a weatherproof area rug, setting up a vertical planter for fresh cooking herbs right next to the prep station, mounting a weatherproof television for game days, or setting up wireless outdoor speakers for ambient music.
DETERMINING WHEN TO CONTRACT OUT THE WORK
Managing this project requires an honest assessment of your skillset. Many homeowners successfully take on the role of a general contractor rather than doing every ounce of physical labor themselves. They manage the overall design, purchase the components, and perform the final aesthetic installations, but they hire specialized subcontractors to pour the concrete slab, construct complex roof structures, and execute the precise plumbing and electrical connections. This balanced approach protects your financial investment, guarantees code compliance, and ensures that your new outdoor kitchen is safe, durable, and ready for years of exceptional gatherings.