

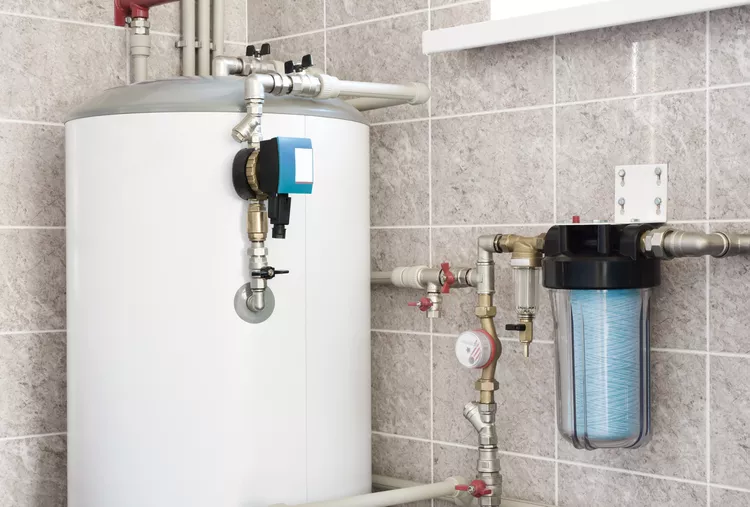
Clear the Sludge: The Complete Step-by-Step Guide to Flushing Your Water Heater
There is arguably nothing quite as universally comforting as stepping into a steaming hot shower after a chaotic day. We entirely take our home’s hot water system for granted—until it suddenly starts sputtering, turning lukewarm mid-lather, or making ominous thumping noises from the basement. The hidden culprit behind most of these issues isn't a broken machine, but a silent buildup of mineral crust.
Over months of constant operation, hard water minerals precipitate out of the water supply and settle directly onto the bottom of your water heater's tank. If you neglect to wash this debris out, it creates an insulative layer that forces your system to work twice as hard, sky-rocketing your energy bills and eventually rotting the tank from the inside out.
Flushing your water heater and its companion thermal expansion tank annually is one of the most cost-effective, high-yield preventative maintenance tasks a homeowner can perform. It requires zero specialized plumbing expertise and costs absolutely nothing if you already own a basic garden hose.
Project Overview
| Metric | Details |
| Active Working Time | 30 minutes to 1 hour |
| Total Elapse Time | 1 to 2 hours (plus overnight cooling) |
| Difficulty Level | Beginner / Intermediate DIY |
| Estimated Financial Cost | $0 (Assuming standard household tools) |
The Hidden Threat: Why Sediment Accumulates
Every gallon of water entering your home carries microscopic loads of dissolved minerals, primarily calcium carbonate and magnesium. When this water is subjected to intense heat inside your tank, a chemical reaction occurs, causing these minerals to crystalize into solid particles.
Over time, this debris forms a thick, sandy layer at the floor of the tank. For gas heaters, this layer blocks the burner's heat from reaching the water efficiently. For electric models, the lower heating element becomes buried in sludge, causing it to overheat and burn out prematurely. Regularly flushing the tank physically sweeps this debris out before it solidifies into a permanent crust.
Five Red Flags That Demand an Immediate Tank Flush
If your water heater is struggling, it will usually let you know before it fails completely. Keep a lookout for these classic symptoms:
-
Visual Discoloration: If the water running into your bathtub or sink looks yellowish, rusty, or tinged with brown sediment, your tank is full of loose debris.
-
Acoustic Disturbance: If your basement sounds like a popcorn machine or a boiling cauldron, that is the sound of trapped pockets of water boiling beneath a heavy shelf of hardened mineral scale. As the steam escapes, it causes the sediment layer to crack and pop.
-
Olfactory Red Flags: A distinct rotten-egg or sulfurous aroma when the hot water runs is a primary indicator that anaerobic bacteria are thriving within the stagnant sediment bed at the bottom of the appliance.
-
Thermal and Pressure Fluidity Issues: If your hot water supply runs out in half the time it used to, or if the water temperature fluctuates wildly between boiling and freezing, sediment has compromised the tank’s internal capacity and thermostat accuracy.
-
Spiking Utility Invoices: When a thick blanket of calcium isolates the water from its heat source, the system must burn fuel or draw electricity for much longer cycles to reach its target temperature, noticeably raising your monthly energy bill.
Critical Safety Protocols
⚠️ WARNING: Scalding and Electrical Hazards
The water inside a residential water heater is routinely maintained between 120°F and 140°F—hot enough to cause severe third-degree burns within seconds. The single smartest move you can make is to cut the power to the heater the evening before you plan to work on it. This allows the internal water volume to cool down naturally, mitigating the risk of injury and allowing you to safely repurpose the drained water for yard irrigation.
Furthermore, never under any circumstances activate the electricity or gas supply to a water heater if the storage tank is empty. Doing so results in a catastrophic event known as "dry firing," which will instantaneously snap an electric heating element or warp a gas tank, permanently ruining the appliance.
The Tool Kit
You do not need a truck full of specialized gear to execute this project successfully. Collect these common household items before you begin:
-
Standard Garden Hose: Heavy-duty rubber options are preferred, as they handle warm water flow without crimping.
-
Sturdy Five-Gallon Bucket: Used for checking water clarity and capturing rogue drips.
-
Absorbent Microfiber Towels: Essential for catching minor spills around the drain valve.
-
Channel Lock Pliers (Slip-joint pliers): For securely tightening and loosening the hose connection on the drain valve bib.
Step-by-Step Execution Guide
Step 1: De-energize the Heating Apparatus
Your first priority is ensuring the system cannot actively engage its heating mechanisms while you work.
-
For Gas-Powered Units: Locate the external control dial, typically found near the bottom base where the main gas line feeds into the thermostat housing. Note your current temperature preference so you can return to it later. Rotate the main dial down to the "Pilot" or "Vacation" setting. This leaves the tiny pilot flame lit but prevents the main burner assembly from firing up.
-
For Electric-Powered Units: You must isolate the system electronically at your home’s primary circuit breaker panel. Locate the dedicated double-pole breaker labeled for your water heater (usually a 30-amp breaker) and flip it completely to the OFF position. If your panel lacks clear labels, do not guess—shut off the main breaker to the entire property to guarantee your safety.
Step 2: Purge the Pre-existing Hot Water Volume
If you did not turn off the machine the night before, you must manually push the thermal energy out of the tank. Turn on a high-volume hot water tap—like a bathtub spout—and let it run on full heat for 20 to 30 minutes. This draws the hot water out of the tank and replaces it with cold, ground-tempered water, significantly reducing your risk of getting burned.
Step 3: Isolate the Tank from the Main Utility Line
Look at the very top of your water heater setup. You will see two metal or flexible pipes entering the unit. One is color-coded or marked for cold water input. Locate the shut-off lever or gate valve on this line and rotate it clockwise (or turn the lever perpendicular to the pipe) to shut off incoming water.
[Main Supply Line] ──► [Cold Valve: TURN OFF] ──► [Water Heater Tank] 💡 Note on Gas Supply Lines
You do not need to turn off the actual yellow gas supply line valve for this routine maintenance. Leaving the thermostat set to "Pilot" keeps the gas line safely managed without introducing air into the fuel lines, which requires a tedious re-lighting process later.
Step 4: Hook Up the Drain Apparatus
Near the bottom of the tank, you will find a small spigot known as the drain valve. This component is constructed out of either brass or plastic.
-
Manually thread the female end of your garden hose onto this drain valve.
-
Use your channel lock pliers to give the connection an extra quarter-turn to guarantee a watertight seal, but be gentle if the valve is made of plastic to avoid snapping the threads.
-
Wrap a clean towel completely around this junction to catch any unexpected sprays.
-
Route the opposite end of the garden hose to a safe discharge area—such as a driveway, a dedicated storm drain, or out into the yard.
🛑 CRITICAL WARNING
Never route the drain hose into an indoor kitchen sink, standard residential bathtub, or shower basin. The heavy, abrasive mineral sediment rushing out of the tank can permanently scratch porcelain and acrylic finishes. More importantly, large flakes of mineral scale can easily clog the small diameter P-traps beneath indoor drains, trading a simple heater project for a major sewer line blockage.
Step 5: Establish a Vacuum Break
Go to the highest floor of your home (or simply use a sink adjacent to the utility closet) and turn the hot water handle completely to the open position. This permits atmospheric air to enter the plumbing system, breaking the vacuum lock inside the pipes. Without this step, the water inside the water heater will struggle to drain freely, much like holding your thumb over the top of a straw filled with liquid.
Step 6: Initiate the Drainage Phase
With your hose properly routed outdoors, place a five-gallon bucket directly beneath the unit’s upper Temperature and Pressure (T&P) relief valve. Open the lower drain valve spigot using a flathead screwdriver or by turning the integrated handle.
Next, lift the silver metal test lever on the upper T&P valve to allow air to rush directly into the tank core. Water will begin moving swiftly through the garden hose. Let this process run continuously for roughly 15 to 20 minutes until the tank empties completely.
The Clarity Assessment
You cannot simply assume the tank is clean just because it has stopped draining. You need to verify that all the loose sludge has been flushed out.
┌─────────────────────────────┐ │ FILL DISCHARGE BUCKET │ └──────────────┬──────────────┘ ▼ ┌─────────────────────────────┐ │ LET SIT FOR ONE MINUTE │ └──────────────┬──────────────┘ ▼ Is the water fully clear? / \ YES NO / \ ▼ ▼ ┌───────────────────────┐ ┌───────────────────────┐ │ PROCEED TO CLOSE DIAL │ │ KEEP SYSTEM OPEN │ │ AND REFILL TANK │ │ UNTIL DEBRIS CLEARS │ └───────────────────────┘ └───────────────────────┘ If the water remains murky or you notice sand-like granules settling at the bottom of the bucket, turn the main cold water inlet valve back on for a brief 60-second burst while the drain valve remains open. This introduces a turbulent rush of fresh water that stirs up the remaining sediment on the floor of the tank. Repeat this cycle every ten minutes until the discharge stream is completely clean.
Recommissioning the System
Once the water runs clear, it's time to safely put the system back together:
-
Secure the Openings: Fully close the lower drain valve and carefully detach the garden hose, keeping the tip elevated to prevent any remaining water from dripping onto your floor. Lower the test lever on the upper T&P safety valve back to its original sealed position.
-
Refill the Core Reservoir: Leave your indoor sink faucet open on the hot setting. Slowly open the main cold water inlet valve at the top of the water heater. You will hear water rushing into the tank. As the tank fills, it will push trapped air out through the open indoor faucet, resulting in loud sputtering and hissing sounds. Once a steady, unbroken stream of water flows from that indoor tap, your water heater is completely full.
-
Restore Energy Sources:
-
For electric models, walk back to your main breaker panel and flip the circuit switch back to ON.
-
For gas models, push the thermostat dial inward and rotate it away from "Pilot," resetting it to your original temperature setting (typically around 120°F).
-
Post-Maintenance Inspections
After 30 minutes, check the closest faucet to ensure the water is heating up correctly. Walk back to the utility closet and perform a careful visual check around the drain valve threads and the T&P relief valve discharge tube. Look for any persistent weeping, slow drips, or pools of water, ensuring everything is bone-dry and properly sealed.
Terminal Diagnostics: Repair vs. Replace
While an annual flush will significantly extend the operational life of your appliance, it cannot stop the aging process forever. If you complete a thorough flush but continue to experience system issues, look out for these signs that your tank may need to be replaced:
-
Internal Tank Structural Leaks: If you notice standing water gathering inside the safety pan underneath the heater, the inner steel lining has likely split or rusted through due to corrosion. This cannot be repaired and requires an immediate replacement.
-
Persistent Structural Oxidation: Deeply discolored red or orange water that persists even after a thorough flush indicates that the sacrificial anode rod has been completely consumed, and the main iron walls of the tank are now actively rusting away.
-
Diminished Efficiency: If your hot water runs out within minutes of turning on the shower, your internal heating elements are failing, or the lower portion of the tank is permanently blocked by calcified sediment that cannot be cleared by a standard flush.
-
The Decade Milestone: Most standard storage-tank water heaters are engineered to last between 8 and 12 years. If your unit is past its tenth year of service, investing money into repairs is rarely cost-effective compared to upgrading to a modern, energy-efficient model.
When to Call a Licensed Professional
While this guide covers standard DIY maintenance, there are two common scenarios where you should put down the tools and call a professional plumber:
The Stuck Valve Dilemma
If you attempt to open the drain valve and it refuses to budge, do not force it with a heavy wrench or cheater bar. Plastic and aging brass valves can easily snap off under excessive force. If the valve breaks, it will instantly release a high-pressure torrent of water directly into your home. A professional can safely extract a frozen valve and install a durable, full-port brass replacement.
Additionally, if your home’s water heater has been neglected for five years or longer, the sediment layer may have hardened into a solid concrete-like mass. A standard flush won't be enough to clear this out, and attempting to do so can trap large chunks of scale in the drain mechanism, preventing the valve from closing properly. A licensed plumber has the specialized chemical flushes and tools required to break down this heavy scale safely.