

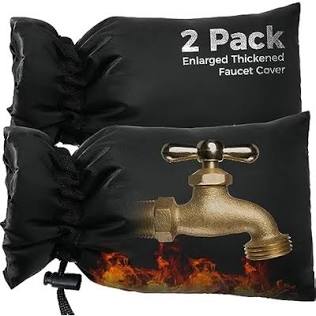
Defeating the Freeze: The Complete Guide to Winterizing Your Outdoor Faucets
As autumn winds down and the first true frost approaches, homeowners everywhere check off their standard cold-weather tasks: raking leaves, cleaning gutters, and turning on the furnace. There is one critical property-saving task that frequently falls through the cracks until it is too late—properly draining and insulating outdoor water spigots.
Water possesses a unique and highly destructive physical property: when it transitions from a liquid to a solid crystalline structure, it expands by approximately 9%. If that water is trapped inside a copper, PEX, or galvanized steel pipe buried within your home's exterior walls, the expanding ice exerts immense volumetric pressure—up to 30,000 PSI. This is more than enough force to cleanly split metal pipe walls, rupture solder joints, and tear open rubber washers.
The nightmare scenario rarely happens during the freeze itself; it happens days or weeks later during a thaw. The solid ice block melts, unleashing a high-volume, unpressurized deluge inside your drywall, insulation, and finished basements. Fortunately, this entire catastrophe can be avoided in less than 20 minutes with a minor investment in basic insulation materials.
Project Specifications
| Parameter | Details |
| Active Labor Time | 10 to 15 minutes per spigot |
| Total Project Duration | 15 to 30 minutes |
| DIY Skill Requirement | Absolute Beginner |
| Financial Investment | $5 to $20 total |
Why Standard Spigots are Vulnerable
Traditional outdoor spigots, technically known as hose bibbs or sillcocks, feature a shut-off valve located directly at the exterior wall of the house. This means that even when the handle is turned completely off, a column of standing water remains entirely exposed to ambient outdoor temperatures, separated from the freezing air by just a fraction of an inch of brass.
When sub-freezing temperatures hit, this small volume of water solidifies instantly. As it expands, it acts like a hydraulic piston, pushing backwards into the home's warmer interior plumbing. The pipe eventually ruptures at its weakest point—often inside the heated envelope of the house—meaning you won't even know a pipe has burst until you try using the water lines later.
The Essential Winterization Toolkit
You do not need an array of specialized plumbing tools to protect your exterior utility lines. Gather these few simple items before starting:
-
Insulated Outdoor Faucet Covers: One dedicated dome or sock-style cover for every exterior spigot on the property.
-
A Sturdy Five-Gallon Bucket: To catch the residual water volumes drained from the interior supply lines.
-
Adjustable Wrench or Channel Lock Pliers: Necessary only if your garden hoses or splitters are corroded or overtightened onto the spigot threads.
-
Microfiber Rag: To dry the exterior fixture before applying insulation.
Step-by-Step Winterization Sequence
To completely eliminate the risk of pressure buildup and frozen lines, follow this specific, logical sequence of steps. Skipping even one part of this process can leave enough trapped water to fracture your plumbing line.
The Operational Workflow
Visualizing Your Plumbing Infrastructure
Understanding the exact physical anatomy of your exterior plumbing helps contextualize why this process works so well. Below is the internal configuration of a modern, self-draining alternative to traditional spigots:
Deciphering Faucet Types: Traditional vs. Frost-Free
As shown in the technical diagram above, a frost-proof sillcock utilizes an elongated metal stem that ranges anywhere from 6 to 30 inches in length. This long configuration ensures that the critical valve seat, seals, and active water supply remain positioned deep inside the warm, insulated envelope of the home's interior crawlspace or basement.
When you turn the exterior handle of a frost-free unit, you are actually turning a long internal rod that shuts off the water way back inside the house. The remaining water left in the front section of the pipe then drains out out of the down-sloped spout naturally.
🛑 CRITICAL WARNING FOR FROST-FREE FAUCETS
Even if your home is equipped with modern frost-free sillcocks, you MUST still disconnect your garden hoses before freezing weather arrives. If a hose is left connected, gravity cannot draw the water out of the long internal stem. The water will remain trapped deep inside the foundation wall, freezing solid and splitting the internal tube. The next time you open the valve in the spring, water will spray directly out of the split tube inside your interior walls.
Evaluating Your Insulation Materials
When shopping for protective insulation gear, you will generally run into two distinct manufacturing styles. Both perform remarkably well, provided they are applied with a tight seal.
Rigid Expanded Polystyrene (EPS) Domes
These traditional covers consist of a molded shell made from dense thermal foam, lined with a flexible foam rubber gasket along the perimeter. They use a simple loop mechanism that hooks onto the tap handle, drawing the cover tight against the house structure when pulled. These provide excellent impact protection and a very consistent thermal barrier.
Insulated Fabric Sleeves
Often referred to as faucet socks, these units feature a rugged, waterproof nylon exterior shell filled with thick micro-fiber insulation, similar to a miniature winter coat. They are highly flexible, making them an exceptional option for irregularly shaped spigots, dual splitters, or spigots mounted extremely close to ground level where a rigid dome won't physically fit.
Pro Tips for Maximum Thermal Security
-
The Radiated Heat Principle: Faucet covers do not generate their own heat. Instead, they work by capturing the small amounts of ambient thermal energy that naturally conduct from your warm interior living spaces through the copper pipes and foundational wall out to the exterior fixture. The insulated enclosure simply holds this escaping heat close to the brass body, preventing it from dropping below 32°F.
-
Keep Your Interior Maintained: Because these systems rely entirely on heat transfer from inside the home, you must maintain a stable, warm temperature inside your living spaces throughout the winter. If you turn your interior thermostat completely off or winterize a vacant house without keeping the furnace running at a baseline of at least 55°F, the faucet covers will lose their primary source of warmth and fail to protect the lines.
-
Eliminate Exterior Structual Gaps: Take a close look at the point where the metal pipe pierces your home's exterior siding. If you notice gaps, missing mortar, or deteriorated caulk, cold air can blow directly into your wall cavity, bypassing your insulation entirely. Seal these cracks with high-quality exterior silicone caulk or expanding foam before mounting your faucet covers.
Emergency Troubleshooting: What If the Line is Already Frozen?
If you forgot to winterize your pipes and walk outside during a cold snap to find your spigot covered in frost with a handle that refuses to budge, do not panic—but act fast.
┌─────────────────────────────┐ │ LOCATE INDOOR SHUT-OFF │ └──────────────┬──────────────┘ │ ▼ ┌─────────────────────────────┐ │ CLOSE VALVE IMMEDIATELY │ └──────────────┬──────────────┘ │ ▼ ┌─────────────────────────────┐ │ OPEN EXTERIOR FAUCET VALVE │ └──────────────┬──────────────┘ │ ▼ ┌─────────────────────────────┐ │ APPLY GENTLE INDIRECT HEAT │ │ (Hairdryer / Heat Wrap) │ └─────────────────────────────┘ Never under any circumstances attempt to thaw a frozen plumbing line using a propane torch, open flame, or high-temperature heat gun. The intense, concentrated heat will boil the trapped liquid instantly, creating superheated steam that can cause the pipe to rupture violently. Additionally, you run a severe risk of accidentally igniting the dry wood framing inside your rim joist cavity.
Instead, immediately close the indoor isolation valve to stop any incoming water pressure. Open the exterior tap, and wrap the exposed brass body in towels soaked in hot water, or use a standard household hairdryer set to low heat. Move the warm air stream back and forth continuously until a steady drip begins, allowing the ice blockage to melt out safely through the open spout. Once thawed, inspect the visible pipe work carefully for hairline fractures before restoring pressure.
When to Bring in a Licensed Plumber
While mounting an insulated cover is an easy DIY task, certain property configurations require a professional touch. If you look under your home and discover there is no indoor shut-off valve present on the water line feeding your exterior spigot, you are highly vulnerable. While a faucet cover helps, you should hire a licensed plumber to cut into the line and solder a modern ball valve with an integrated waste drain.
Similarly, if you have an older property and want to upgrade your vulnerable traditional brass hose bibbs to modern, worry-free frost-proof sillcocks, calling a professional plumber is the safest choice. They can accurately assess the width of your home's foundation walls, select the proper stem length, ensure the new pipe is installed with a slight downward slope toward the yard for proper self-draining, and make a secure leak-free connection inside your home's joist bays.